A proper seating pattern for the class is almost close to an effective learning environment. The 30-seating configuration perfectly suits increasing engagement, cooperation, and academic performance.

It has discussed various seating configurations, benefits, drawbacks, and practical implementation tips.

Understanding the Importance of Seating Arrangements

Seating arrangements have a significant influence on classroom dynamics.

It influences how students interact with themselves and the teacher, thus influencing behavior and outcome of learning. A considered arrangement can

  • Group work: Pull it together and discuss.
  • Higher Concentration: Reduce Diversionary Agents -Put students accordingly.
  • Encourage Participation: Create an inclusive environment where all students feel comfortable contributing.

Common Classroom Seating Arrangements
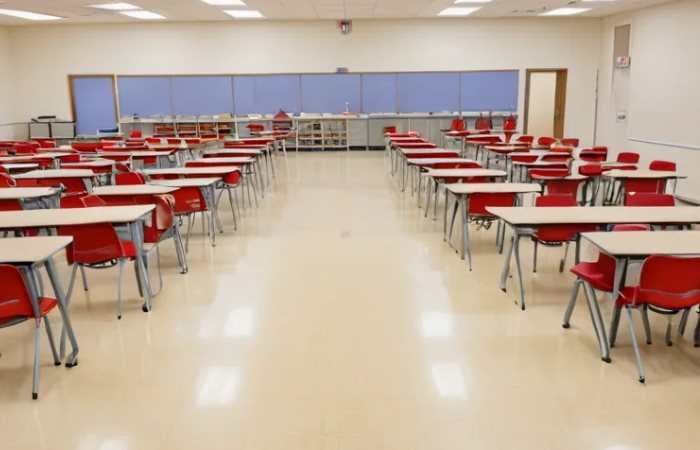
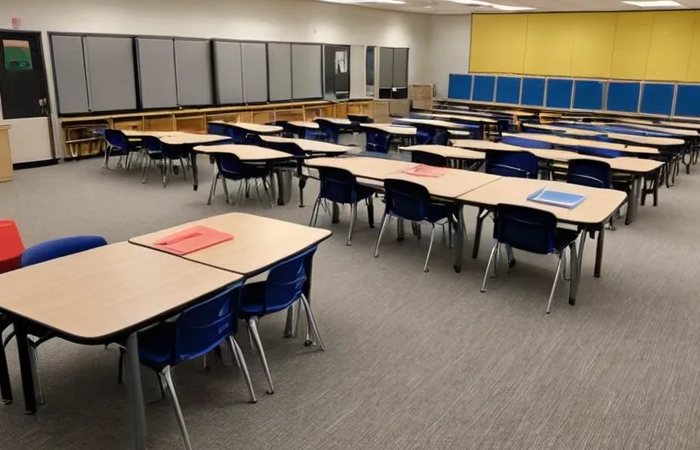
1. Traditional Rows

Traditional Rows

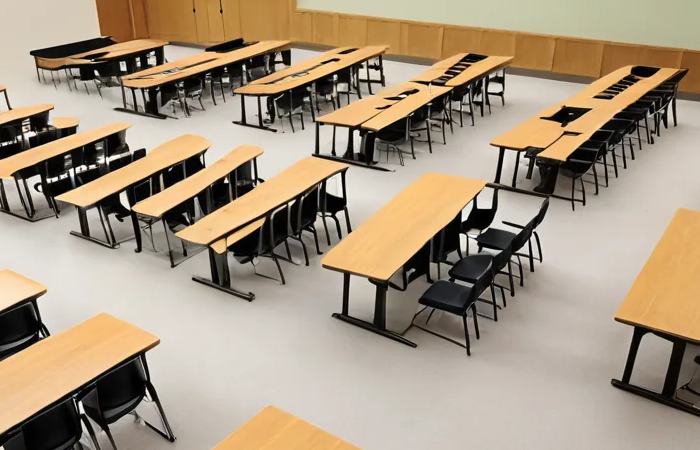
Description: It has desks and chairs lined up in rows facing forward.

Pros:

  • The system makes it easy to monitor and control students by teachers.
  • Accompanies lectures and presentations.

Cons:

  • Limits interaction among students.
  • The activity leads to the disengagement of the students in the back rows.

2. U-Shape

U-Shape

Description: Some desks form a U shape.

Pros:

  • This encourages debates and interaction among students.
  • It makes it possible for the teacher to reach every pupil.

Cons:

  • It would not be very cooperative in group work, as that would mean less collaboration along the U-shape.
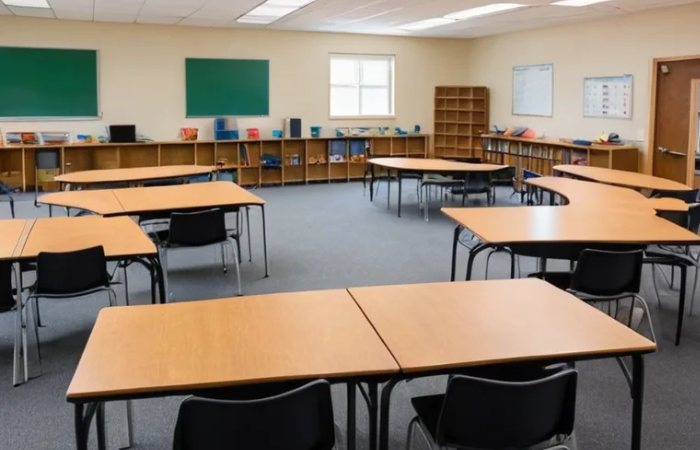
3. Pods/Groups

Pods/Groups

Description: Small clusters or pods are placed around them.

Pros:

  • It promotes teamwork and collaborative learning.
  • Students can easily talk and share id

Cons:

  • Needs constant supervision lest off-task behavior results.
  • It may be difficult for teachers to monitor various groups simultaneously.

4. Horseshoe

Horseshoe

Description: Like the U-shape, but often with more stations, it resembles a huge semi-circle.

Pros:

  • It fosters communication, and the teacher can move about the classroom quickly.
  • Suitable for group discussions and interactive lessons.

Cons:

  • Space constraints may make it impossible to accommodate smaller classes.
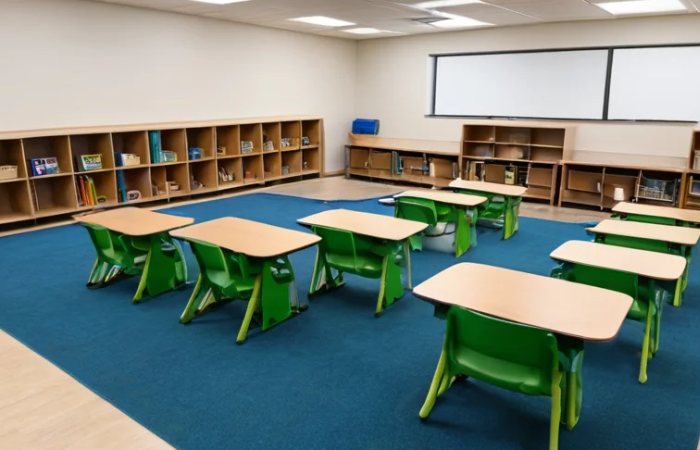
5. Flexible Seating

Flexible Seating

Description: Students will sit; activity-based seating encourages multiple configurations throughout the day.

Pros:

  • Enable the learners to make decisions about their learning environment.
  • It accommodates numerous learning preferences and styles.

Cons:

  • Demands Coordinated Management to Ensure a Smooth Transition.
  • It may cause diversions if not monitored accordingly.

Strategic Considerations

  • Behavior Management: Allowing for students’ personalities and relationship patterns, grouping the easygoing students who do not cause each other to become disturbed, but separate those students who would disturb each other.
  • Accommodating Teaching Style: Use it with your seating arrangement. Since you are an interactional type of teacher, rows aren’t the way to go; pods or a U-shape would be more your thing.
  • Space Utilisation: The layout must enable free movement in the classroom. This is important for observing student learning and handling group work activities.

Example Layouts

Arrangement Type Description Best For
Traditional Rows Straight rows facing front Lectures
U-Shape Desks in a U-formation Discussions
Pods Groups of desks Collaborative work
Horseshoe Semi-circle setup Interaction
Flexible Seating Student-chosen arrangements Varied learning styles

Practical Strategies for Implementation

Assessing Student Needs

Collect data on your students’ preferences and learning styles before you choose a seating arrangement.

Find out from them by conducting a survey or even just an informal discussion.

That information will help you determine what kind of seating arrangement to apply.

Trial and Error Approach

Use the school year to experiment with different configurations. Find from the students what works well for them, then adapt.

This can be an iterative process that may lead to a more effective arrangement that meets the needs of your classroom as they change in time.

Utilizing Technology

This can also be done by apps and online planners on a concrete layout of your classroom using different arrangements before you start for an ideal application in class.

It saves time and enables one to make the most out of things without violating safety standards and access provisions.

Conclusion

The seating arrangement of a class of 30 can be optimal to create an exciting and productive classroom.

One has to learn its merits and demerits and then take feasible strategies to optimize class dynamics effectively. Remember, each class is unique.

So, be flexible with your approach and willing to adapt if necessary to meet the requirements of your students.

With some planning and thoughtfulness, the classroom can come alive as a place of collaborative learning and increased attention and active engagement of every student.

The kind of guide that brings out the way teaching methods empower educators in pushing for the best in classroom management.

Introduction

Window grills form part of modern home design integrated into the security system but with an aesthetic twist. From yesterday to today, minimalist window grill designs have trended through clean lines and functional elegance as we head into 2024.

Learn the hottest trends and options in personal customization while learning how to keep window grills in top shape.

Popular Modern Window Grill Designs

1. Minimalist Grids

Minimalist Grids

Modern window grilles can be ordered by customers in specific sizes or styles and they can fit according to the color, material, and even patterns suited to their favorite tastes.

2. Geometric Patterns

Geometric Patterns

Modern grilles for traditional windows resort to geometric patterns. A primitive pattern of hexagons or triangles can lead to a good effect quite quickly.

3. Curved Designs

Curved Designs

Curved window grills make the edges of windows soft and tend to be finer. They can even be charming to the houses that possess rounded architectural features.

4. Open Frame Designs

Open Frame Designs

Open frame designs are open and embrace daylight but acquire the character of safety. Most are built with fewer bars or a distributed configuration, hence very suitable for aesthetic purposes.

5. Customizable Options

Customizable Options

Many modern window grills can be ordered in size or design. House owners can, therefore, order the windows in different colors, materials, and designs to match their choice.

Customization Options

Window grills can also be available in different customized designs.

  • Materials: Stainless, wrought iron, and aluminum are very readily available. This material has its aesthetic properties as well as durability.
  • Colors: These have different options to fit that home’s outer looks, and powder-coated finishes will offer color with protection from the elements.
  • Patterns: Most companies offer personal patterns that may represent personal preferences or complement other architectural designs.

Smart Window Grill Technology

A new trend in home security is the inclusion of innovative technology in the window grill.

  • Features of Remote Control: Some newer grills feature remote control with the ability to access and close doors from any room.
  • Automated Alerts: Smart grills can send notifications to your smartphone if tampered with or opened unexpectedly, enhancing security.

Maintenance Tips for Window Grills

With proper care, window grills work perfectly and look fantastic.

  • Routinely Clean: Use mild soap and water to clean away dirt and debris for cleaning metal grills. Avoid abrasive cleaners that may scratch the surface.
  • Check for Damage: Inspect regularly for rust or damage, especially in coastal areas where salt air will accelerate corrosion.
  • Repaint as Necessary: You will notice peeling paint or even rust spots, and that’s when you sand down that area and repaint to keep everything protected from the elements.

Cost Considerations

Understanding the cost for different window grill designs is important in budgeting:

  • Intrinsic Designs: Intrinsic designs usually run from $50 to $150 per unit.
  • Custom Designs: As per the material and complexity, more complex designs or any custom designs will cost around $200-$500 or even more.
  • Installation Costs: You are hiring a professional who will, of course, require installation. This will attract an extra $ 100 to $ 300 depending on the location and complexity of installation.

Installation Guidelines

Window grills should be installed in compliance with the rules listed below:

  • Homeowners often put in more basic versions but can usually hire a professional to install custom or advanced versions.
  • Tools to be used Screw anchors and screws would be used for installation.
  • Safety precautions: Always carry safety goggles while drilling and ensure that you follow the manufacturer’s instructions closely.

Conclusion

Modern, elegant window grill designs represent the best style and safety for any kind of housing.

Here, you can look at attractive design options and capabilities for customizing and keeping up with tips on ways to make your windows both good-looking and safe.

From minimalist grids to interesting geometric patterns, an investment in quality window grills will benefit your home well into the future.

FAQs

What are the latest trends in modern window grill designs?

The latest fashions included minimal grids, geometric patterns, and customization.

How to Change the Window Grills?

You can personalize materials, colors, or patterns, or even add some intelligent technology.

What maintenance do window grills require?

Maintenance of the doors’ appearance and function includes regular cleaning and checking for rust or damage.

How much do modern window grills cost?

Prices are between $50 and even exceed $500 for customized designs.

Can I install window grills myself?

Some straightforward designs are DIY-friendly, but complicated installations are best left to professionals.

The front page of any school project is a setting for the work within. So, an ornate border enhances the visual appeal and portrays the creativity and effort behind it. This guide will give detailed insights into creating unique, thematic, and visually interesting front-page border designs for your school projects.

Why Border Designs Matter?

  • Visual Appeal: A creative border grabs the eye and makes your page pop.
  • Organization: Borders will define your content clearly, keeping it intelligible.
  • Thematic Representation: It tells you, at a glance, what your topic is.

Popular Front Page Border Ideas

1. Nature-Inspired Borders

Nature-Inspired Borders

  • Floral Patterns: Draw fragile vines, leaves, or flowers using colored markers or watercolors.
  • Animal Motifs: Add minimal miniatures relevant to your project theme.

Tips: Underneath, choose muted shades for a soft, natural look that flatters most subjects.

2. Geometric Patterns

Geometric Patterns

  • Borders are created in triangles, circles, or squares for a contemporary, clean look.
  • Use overlapping shapes or symmetry to add space.
  • Suitable for mathematics, science, and engineering projects.

3. Seasonal Themes

Seasonal Themes

  • Winter: Snowflakes and icy blue colorations.
  • Spring/Summer: Add sunflowers, butterflies, beach, etc.
  • Autumn: Use warm-toned leaves or pumpkins.

4. Subject-Specific Borders

Subject-Specific Borders

  • Math: π, number, and even a
  • Add scrolls, quill pens, or book spines.
  • Science: Representing atoms, test tubes, or DNA strands.
  • History: This may include old architecture or timeline.

5. Minimalist Dotted Lines

Minimalist Dotted Lines

  • Dotted or dashed lines are simple, and a professional look suits all subjects.

6. Cultural Motifs

Cultural Motifs

  • Those can be traditions or designs from other cultures. For example, one may use mandalas for artworks and Celt’s knots for history assignments.

7. Educational Icons Border

Educational Icons Border

  • Description: Utilize icons that correspond to the theme of your project (atoms for chemistry, books for literature).
  • Suggestion: A monochromatic color scheme can also be used for a wealthier look.

8. Photographic Borders

Photographic Borders

  • Description: Photographic media studies and documentary work on bordering projects are rich, relevant, and valuable digital images.
  • Tip: The images should not distract but rather sustain the readability of the project.

9. Seasonal or Holiday Themes

Seasonal or Holiday Themes

  • Description: Borders of the season or a relevant holiday/ festival will give it a seasonal feel.
  • Tip: Maintain professionalism and topical relevance.

10. Abstract Art Borders

Abstract Art Borders

  • Description: Suitable for art, design, or psychology projects. Abstract graphics are good for making background.
  • Tip: Use dramatic designs with a lot of white space.

Step-by-Step Guide to Crafting Borders

Materials You’ll Need

  • White or colored paper
  • Stencils (optional)
  • Pencil, eraser, ruler
  • Colored markers or pens

Steps to Design a Hand-Drawn Border

1. Plan Your Design:

  • Lightly use a pencil first before you finish it with
  • Match the border design to your project’s theme.

2. Draw the Border:

  • Use a ruler for geometric shapes and a freehand for organic shapes.
  • Complete,Smooth look  Sharp, straight, clean lines.

3. Add Details:

  • Border enrichment with designs, shading, or textures.
  • Use colors that complement your subject.

4. Final Touches:

  • Correct pencil marks once ink or marker lines are dry.
  • Add extra embellishments- such as stickers, glitter, or wash tape.

Digital Border Design Options

For projects submitted online, digital tools provide excellent alternatives:

Design Software

  • Canva: Easy and ready-to-use
  • Adobe Illustrator: Much heavy customization work
  • Microsoft Word: It offers plain borders that can be used easily.

Steps for Digital Borders

  • Usea template or design of your choice.
  • Thematic symbols, colors, or text are added at the border.
  • Save your design as part of your document or as a separate image.

Pro Tips for an Impressive Front Page

  • Simple, yet at the same time attractive enough so as not to detract from the content.
  • Consistent Colors: Use a color palette that will always resonate with your project’s theme.
  • Keep it Clean: Smudges and uneven lines will surely bring horror to the presentation.

Mistakes to Avoid

  • They put in too much matter at the border.
  • Using clashing colors or clashing patterns that compete with your content.
  • No alignment or symmetry will also make the design look unprofessional.

Conclusion

It will give a pretty look to your school project if well designed. With hand-drawn illustrations or with any digital tool, the point is that your design should go with your project’s theme and maintain neat, balanced looks. Use these tips and ideas to design an impressive front page that speaks of dedication and creativity. So, take your pencils or open that design software. It is time to let your imagination wander.

With great enthusiasm and high hopes, the much-awaited series for the West Indies National Cricket Team against the New Zealand National Cricket Team has finally started and is full of thrillers and some fantastic moments. Be it clashes between T20s or matches within ODIs, cricket fans worldwide can’t wait to seize every moment live.

Here’s the perfect viewing guide for all regions, platforms, and match details.

Match Highlights and Details

Women’s T20 World Cup 2024

  • Match Date: October 18, 2024
  • Start Time: 7:30 PM IST (Toss at 7:00 PM IST)
  • Venue: Sharjah Cricket Stadium, Sharjah

Men’s T20 World Cup 2024

  • Match Date: June 13, 2024
  • Start Time: 6:00 AM IST (Toss at 5:30 AM IST)
  • Venue: Brian Lara Stadium, Tarouba, Trinidad

Live Streaming Platforms by Region

India

  • Television: Star Sports Network
  • Online Streaming: Disney+ Hotstar (HD streaming with mobile and desktop compatibility)

United States

  • Television: Willow TV (renowned for its cricket broadcasting)
  • Online Streaming: Sling TV and ESPN+ provide live match coverage and detailed analysis.

United Kingdom

  • Television: Sky Sports Cricket
  • Online Streaming: Sky Go app or Now TV for flexible viewing options.

Australia

  • Streaming Service: With a new Prime membership, Amazon Prime Video is included.

New Zealand

  • Streaming Services: Sky Sport and Spark Sport for high-class streaming and local coverage.

Caribbean Region

  • Television: Flow Sports
  • Streaming: Digicel Sports

Additional International Streaming Options

For all viewers outside their home regions:

  • Global Options: YouTube Live, Facebook Watch, and Twitch arefree live coverage.
  • Allow a VPN: NordVPN, ExpressVPN, or its alternative will open geo-blocked systems to see effortlessly.

Recommended Viewing Platforms

Global Favorites

  1. Willow TV

    • Competitive Pricing
    • Dedicated to cricket coverage
    • Multiple match angles
  2. Disney+ Hotstar

    • Affordable plans
    • Real-time updates
    • Supports multiple languages

Match Formats and Ticketing

  • Formats: Series of T20, ODIs, Test Matches
  • Ticket Information: Buyat official cricketing websites or stadium kiosks.

Key Players to Watch

  • West Indies: Shimron Hetmyer, Jason Holder, Nicholas Pooran
  • New Zealand’sKane Williamson, Trent Boult, and Devon Conway

Streaming Tips for Smooth Viewing

  • A reliableinternet connection, preferably above 10 Mbps.
  • Moreadvanced streaming applications and devices.
  • Compare theprice of the platforms- More budget-friendly: ESPN+ ($9.99/month) or Sky Sport ($25.99/month).

Conclusion

West Indies vs New Zealand excitement is finally in the hands of the cricketing world. From the choice of TV to the availability of online services, there’s something that fills any requirements. Get ready to enjoy the multitude!

Also Read: Oman vs Namibia National Cricket Team

Front-hand mehndi designs have fascinated the eyes of many with their subtle beauty and simple and elegant designs. These add a perfect essence to weddings, festivals, or an ordinary day at work.

This guide captures step-by-step application tips, popular patterns, and secrets for capturing stunning photographs of simple front hand mehndi designs.

Simple Front Hand Mehndi Designs

Floral Patterns:

Floral Patterns


Simple flower design: a minimalist way of doing dainty flower motifs that may be simply applied and still look fabulous.

  • Design Inspiration: Nature’s blooming flowers
  • Occasion: Casual wear, social events

Floral Maze:

Floral Maze

It has a maze of flowers, which is strange but easy.

  • Design Inspiration: Intricate garden pathways
  • Occasion: Festivals, outdoor events

Geometric and Mandala Designs:

Mandala Design:

Mandala Design

A central mandala pattern surrounded by simple lines and dots, perfect for those who appreciate symmetry and balance.

  • Design Inspiration: Ancient mandala art
  • Occasion: Weddings, spiritual gatherings

Circular Stroke Patterns:

Circular Stroke Patterns

It has circular strokes on the palms and fingers. This pattern is made beautiful but does not appear so complex.

  • Design Inspiration: Celestial bodies, orbits
  • Occasion: Formal events, parties

Traditional Motifs:

Peacock Motif:

Peacock Motif

This is an authentic classic. It signifies elegance and beauty. Grace is portrayed with simple styles.

  • Design Inspiration: Indian and Middle Eastern cultural heritage
  • Occasion: Traditional weddings, cultural festivals

Jhumka Design:

Jhumka Design

The traditional jewelry motifs, like jhumkas, is unassumingly brought into the mehndi.

  • ConceptDesigning for Indian Jewelry
  • Occasion: Traditional gatherings, family events

Design Inspiration and Cultural Significance

Nature’s Canvas:

Nature's Canvas

Drawing Inspiration from Leaves, Flowers, and Birds

  • Design Tips: Incorporate natural elements to add depth and meaning to your mehndi design

Architectural Marvels:

Architectural Marvels

Incorporating Geometric Patterns from Historical Monuments

  • Design Tips: Use geometric patterns to create a sense of grandeur and sophistication

Cultural Fusion:

Cultural Fusion

Blending Traditional Designs with Modern Minimalist Elements

  • Design Tips: Experiment with fusion designs to create a unique, personalized look

Step-by-Step Application Guide for Beginners

Preparation is Key:

Tips for Preparing Your Hand and Mehndi Paste

  • Step 1: Wash and dry your hands thoroughly
  • Step 2: Apply a thin layer of eucalyptus oil or lotion to your hands

Outlining Perfection:

How to Create Flawless Outlines?

  • Step 1: Use a mehndi cone or a fine-tip brush to create the outline
  • Step 2: Start with simple shapes and gradually add details

Filling with Finesse:

Techniques for Filling in Your Design

  • Step 1: Use a thicker mehndi cone or a brush to fill in the design
  • Step 2: Apply gentle pressure, filling in sections at a time

Seasonal and Occasion-Specific Simple Mehndi Designs

Summer Breeze:

Summer Breeze

Light, Airy Designs Perfect for Warm Weather

  • Design Suggestion: Simple floral patterns with minimal details

Winter Wonderland:

Winter Wonderland

Bold yet Straightforward Designs to Match the Festive Season

  • Design Suggestion: Geometric patterns with bold lines and minimal ornaments

Festive Delights:

Festive Delights

Remarkable Occasion Mehndi Designs with a Minimalist Twist

  • Design Suggestion: Traditional motifs with simple, modern twists

Photography Tips to Make Your Mehndi Shine

Natural Light:

Harnessing the Power of Sunlight for Stunning Photos

  • Tip 1: Shoot near a window or outside during the golden hour
  • Tip 2: Use a reflector to soften harsh shadows

Angles and Composition:

Tips for Capturing the Design’s Full Beauty

  • Tip 1: Experiment with different angles, focusing on the design’s centerpiece
  • Tip 2: Use the rule of thirds to balance your composition

Editing Essentials:

Enhancing Your Photos without Overpowering the Mehndi

  • Tip 1: Adjust brightness and contrast to make the Mehndi stand out
  • Tip 2: Apply a subtle filter to enhance the overall aesthetic

Conclusion

Simple front-hand mehndi designs are the most elegant form to discuss elegance and heritage. Let’s dig through the patterns, find the application process, take beautiful photographs, and add this beauty of Mehndi to our hands. Share your experiences with simple Mehndi designs and photos to rejoice in its beauty!

A new baby boy to the family and laughing and ecstatic joy can be sent as a sweet greeting to friends and family for status. This post will guide us through the welcome statuses for a baby boy in social media or private texts. Warm smiles and paper written- some of this is kinda funny.

1. Heartfelt Welcome Messages

Heartfelt Welcome Messages

A new baby boy is of some consequence; now it demands messages speaking love and gladness.

  • “Welcome to the world, little prince! So loved, so loved.”
  • “It is a boy! Welcome, at last, a lovely, handsome baby boy!”
  • “Our family just got a little cuter! Welcome home, baby boy!”
  • “Meet our newest baby boy: [Baby Boy’s Name]! We are so blessed!
  • “Little hands, little feet, big dreams! Welcome to our world, little man!

2. Joyful Announcements

Joyful Announcements

Let the word rejoice; be told your baby boy is here. That’s the glad tale:

  • “How soon our baby boy will be born, our hearts are full of wonder!
  • Here is the boy baby, [Baby Boy’s Name]. We never could be more elated.
  • “The waiting is over at last! Our little boy is here, endless delights.”
  • “Hello, little miracle! Hello, the family!” to the baby boy
  • Henceforth, you will be loved beyond measure. Welcome, baby boy!

3. Humorous Messages

Humorous Messages

There’s not much to do with fun brightening your day with wacky announcements. Here are some funny status messages:

  • “Get ready for infinite adventures with your tiny superhero!
  • “Welcome to the world of changing diapers and sleepless nights!
  • “Our little man is here—let the games begin!”
  • “We just became parents of a little boy—we game on!

4. Short and Sweet Status Ideas

Short and Sweet Status Ideas

  • “Welcome home, little prince!”
  • “Our boy has finally arrived!”
  • “Joy has a new name: [Baby Boy’s Name]!”
  • “Our hearts are full of love for our little boy!
  • A star is born! Welcome baby to the world!

5. Expressing Gratitude

Expressing Gratitude

  • Thanks, everyone, for the love and warmth of the reception of our little boy into this world!!!
  • We feel blessed to introduce our baby boy to all of you!”
  • “Thanks to this new turn in our life with our little son.”
  • “Thanks for sharing in the jubilation of having this little miracle.”
  • “Your love and blessings are the world to us as we celebrate the birth of our baby boy.”.

6. Inspirational Quotes

Inspirational Quotes

This is the most significant expression of emotions concerning this new milestone in life.

  • “The child started a new life”.
  • A newborn boy is an excellent gift to life.
  • Our first breath took yours away; welcome to the world!

7. Creative Announcement Ideas

Creative Announcement Ideas

You can append pictures or videos to your announcement for a marvelous visual look. Among the best ideas are:

  • Attach a picture collage of your newborn with a beautiful message.
  • A series of short vignettes from pregnancy up until one is finally delivered.
  • A picture of a baby shoe or an image of a toy with the caption for his birth.

8. Cultural Variations in Welcoming Baby Boys

Cultural Variations in Welcoming Baby Boys

Every culture has its culture and the way to celebrate after the baby boy is born.

  • Many people do naming ceremonies when they are born.
  • Some have specific rituals or blessings when the newborn child is welcomed.
  • Add a few cultural preferences to make your message extremely sensational.

You can even include your baby’s name or intimate details about their birth date and time, for example, these messages to make them even more special. Feel free to mix and match or modify these statuses to your style and sentiment!

Conclusion

This will be the best moment of life, welcoming a baby boy. It’ll be significant enough with emotional words, funny messages, and inspiring quotes to bring smiles to friends and family. You can welcome this new precious gift through these statuses as you start on this beautiful parenting journey by composing nice words and posting them across social media or personal channels for this precious moment!

Introduction

The classic choice of Black hair is braided updos: both elegant and practical, they protect the natural hair, but this protective styling does open up avenues for creative expression and personal style.

Here, we will take a closer look at the benefits, popular styles, and tips on how to create stunning braided updos that are simple yet striking.

Benefits of Simple Braided Updos For Black Hair

Protecting Natural Hair Health

One of the best benefits braided styles can provide is protection. Pulled-back hair is far less exposed to stressors that stress hair follicles out, make them lose moisture, and then break.

Versatility for Different Occasions

Simple braided updos can be very versatile. Whether it’s going to work, attending a wedding, or just for fun and excitement, there is a braided style for each of those occasions.

Low Maintenance Styles

Most braids that exist require less daily maintenance. They can stay for days or even weeks if done correctly, which is great for a busy lifestyle.

Popular Simple Braided Updos For Black Hair

1. Classic Cornrow Bun:

Classic Cornrow Bun

This creates a tight perfect row of cornrows culminating into a hot bun at the back, which is fashionable and useful.

2. Braided Ponytail Updo:

Braided Ponytail Updo

The feed-in braid creates a voluminous ponytail that gives a modern twist to traditionalism, which works well in any setting.

3. Flat Twists with Twists on Top:

Flat Twists with Twists on Top

The twisted style is flat on top, which covers your hair and it is rather easy to maintain.

4. Feed-In Braids with Low Bun:

Feed-In Braids with Low Bun

The low bun feed-in braids come together as a classy low bun for any event.

5. Two-Tone Box Braids:

Two-Tone Box Braids

The inclusion of color in hair makes it unique and interesting.

6. Box Braid Bob with Bun:

Box Braid Bob with Bun

This merges the old bob hairstyle with a bit of modern bun hairstyle and makes it very fashionable.

7. Mixed Color Box Braids:

Mixed Color Box Braids

Various colors can add up more depth and excitability to your braided updo.

Step-by-Step Guide to Creating Simple Braided Updos For Black Hair

Tools and Products Needed Gather the following tools:

  • Edge control or gel
  • Hair accessories
  • Hair ties
  • Moisturizing cream or oil
  • Rat-tail comb

Preparation Steps for Healthy Hair

  • Applied to dry hair.
  • Use moisturizing cream or oil in hydrating hair.
  • Comb your hair softly with a wide-toothed comb.

Detailed Instructions for Each Style

Classic Cornrow Bun:

  • Divide your hair into sections.
  • Braid every section into cornrows.
  • Bring all the braids up at the back and then tie the whole thing with a hair band.

Braided Ponytail Updo:

  • Braid parts of hair into feed-in braids.
  • Gather all the braids into a high ponytail.

Flat Twists with Twists on Top:

  • Flat twists on the side of your head.
  • Tie the remaining twists together at the top and pin.

Styling Tips for Simple Braided Updos For Black Hair

How to Maintain Moisture and Health?

In addition, constant oil application on the scalp should be maintained so they do not dry or break, thus maintaining the health of braids.

Accessorizing Your Braids

Add a little zing to your braided updos with beads, ribbons, or these decorative pins if your dress calls for it.

Adjusting Styles for Different Face Shapes

Face shape has to be taken into account at the time of choosing an updo because while with a square face, the angles could soften up if one added volume at the crown of the head.

Incorporating Unique Elements

The hair braids can be made to look very unique through creative elements like feathered ends or crisscross designs.

Creative Variations of Simple Braided Updos For Black Hair

  • Rope Braided Ponytail: This is the textured and interesting pony tied by utilizing rope braiding.
  • Braided Side Bun: this is a very simple yet elegant kind that transfers the major look to one side for an elegant look.
  • Half Top Knot With Braids: Comb half of the hair back and put all the rest into a top knot for a totally relaxed, classy look.
  • Cascading Braid Styles: Moves and flows due to the cascading braid style can change any messy updo.

Conclusion:

Simple braid updos can be done in multiple styles without any limits. Healthy hair will go well with many stylists from the simplest look to an artistic form.

FAQs

How long do updo braids last?

Most braided hairstyles last for one week up to several weeks depending on the maintenance and care.

Are braids good for all hair types?

Actually, most of these braided hairstyles can be modified depending on the length and texture of your hair.

Can I do simple braided updos at home?

Absolutely! Beautiful braided updos can easily be created at home with a little practice and the right tools.

What is the best product for maintaining braided styles?

More than ever, moisturizing creams, oils, and edge controls from brands specifically designed for textured hair will keep the braids looking fresh and healthy.

Introduction:

Kickstart your Saturday with positivity! Find the best good morning Saturday images for WhatsApp, and learn how to make the most of a weekend greeting.

Saturdays are a pretty expensive commodity in this fast-paced world-life time to recharge our thinking around what matters and connect again with what is most important.

Here are the best good morning Saturday images for WhatsApp that can help set the tone for a great day while bringing people closer and bringing you closer to a mindful approach to the weekends.

The Power of Visual Greetings

Enhance Weekend Vibes: Good morning images can:

  • Boost mood with vibrant colors and uplifting messages
  • Create a sense of anticipation for the day’s adventures
  • Foster a positive atmosphere for relaxation and leisure

Strengthen Relationships: Share heartfelt messages to:

  • Show loved ones you care about their well-being
  • Rekindle connections and spark meaningful conversations
  • Create shared memories and inside jokes

Mindful Approach: Pair images with intentional reflections for a fulfilling Saturday, such as:

  • Gratitude practices: Share three things you’re thankful for
  • Mindful moments: Take 5 minutes to breathe, relax, and recharge

Top 10 Good Morning Saturday Images For WhatsApp

1. Motivational Quote: “Believe You Can, Watch Yourself Succeed”

Believe You Can, Watch Yourself Succeed

Tip: Share with a friend who needs a motivational boost

2. Serene Landscape: “Peaceful Morning, Peaceful Mind”

Believe You Can, Watch Yourself Succeed (1)

Tip: Don’t forget to take a little time to breathe correctly before diving into the rhythm of your fast-paced daily routine

3. Whimsical Illustration: “Saturday Vibes: Where Cuddles and Coffee Unite”

Saturday Vibes: Where Cuddles and Coffee Unite

Tip: Share with your partner and plan a relaxing morning together

4. Inspirational Message: “Today’s Goals: Eat Pizza, Watch Movies, Repeat”

Today's Goals: Eat Pizza, Watch Movies, Repeat


Tip: Send to a friend who needs a break from their busy schedule

5. Calm Nature Scene: “Breathe, Relax, It’s Saturday”

Breathe, Relax, It's Saturday

Tip: Use as a reminder to take a short walk outside and connect with nature

6. Funny Meme: “When Saturday Finally Arrives…”

When Saturday Finally Arrives

Tip: Share with your colleagues to brighten up their Saturday morning

7. Heartfelt Wish: “Wishing You a Lovely Saturday, Filled with Love”Wishing You a Lovely Saturday, Filled with Love

Tip: Give it to your loved ones as a token of love and appreciation

8. Productivity Tip: “Prioritize Self-Care, Succeed in All You Do”Prioritize Self-Care, Succeed in All You Do

Tip: Share with a friend who might need a reminder to put himself first

9. Beautiful Sunrise: “Rise and Shine, Saturday is Here!”

Rise and Shine, Saturday is Here!

Tip: Set an alarm for the following morning and be fresh and prepared

10. Mindful Moment: “Take 5 Minutes to Reflect, Recharge, and Thrive”

Take 5 Minutes to Reflect, Recharge, and Thrive (2)

Tip: Share with a friend who needs a reminder to practice mindfulness

Making the Most of Good Morning Saturday Images For WhatsApp

  • Customize with Love: Add personal messages to images for a thoughtful touch
  • Share the Positivity: Post your favorite image on social media with #MindfulSaturdayVibes
  • Weekend Planning: Combine image sharing with fun Saturday plans for an unforgettable weekend
  • Create a Tradition: Share a Good Morning Saturday Image For WhatsApp with a friend or loved one weekly to establish a heartwarming ritual.

Conclusion

Elevate your Saturday mornings with the best Good Morning Saturday Images For WhatsApp.

Share positivity, boost your weekend vibes, and mindfully approach the day ahead. Start your Saturday with intention, and make every weekend count!

Introduction

Hello, children; today, we will learn to take up an exciting lesson which is all about little small verbs in the language: “has” “have,” these are helping us surrender our possessions; you, a student of Class 2, must be aware about how to spell them; the correct method to word. Let’s have the amusement.

The Magic of “Has” and “Have”

  • Two uses of the verb “to have”when something is owned or possessed are: has and have. The central difference in this mainly lies between verb and subject agreement.
  • “Has” only attaches to singular subjects, and so it attaches to “he,” “she,” “it,” or one person/entity.
  • Have is a verb with plural subjects, such as “they, ” ” we, ” ” people, ” ” things.

Let’s see some examples:

  • “I have a pencil.” (Here, “I” is the subject, and “have” is the correct verb form.)
  • “My friend has a book.” (Here, “my friend” is the subject, and “has” is the correct verb form.)
  • “We have a dog.” (Here, “we” is the subject, and “have” is the correct verb form.)

Name: _____________________ Date: ________________

Instructions:

Read each section carefully and complete the exercises.

Part 1: Fill in the Blanks

Fill in the blanks with “has” or “have”.

  • I _____ a pet cat.
  • She _____ a red backpack.
  • They _____ ice cream for dessert.
  • He _____ a soccer ball.
  • We _____ a new teacher this year.

Part 2: Choose the Correct Word

Circle the correct word in each sentence.

  • My sister (has/have) a doll.
  • The birds (has/have) built a nest.
  • Tim (has/have) a collection of stamps.
  • You (has/have) a lovely smile.
  • The dog (has/have) a shiny coat.

Part 3: Complete the Sentences

Complete the sentences using “has” or “have.”

  • The sun _____ bright rays.
  • My friends _____ a game to play.
  • Lucy _____ a pretty dress.
  • We _____ a picnic planned for tomorrow.
  • The teacher _____ many books in the library.

Part 4: Draw and Write

Draw a picture of something that someone “has.” Below the picture, write a sentence using “has” or “have”.My Drawing:![Space for Drawing] Sentence:

Part 5: Matching

Match the sentences on the left with the correct endings on the right.

  • I have _____ a) a new bike.
  • She has _____ b) a big family.
  • They have _____ c) many friends.
  • He has _____ d) a beautiful garden.

Answers Key (for teachers)

Part 1:

  • Have
  • Has
  • Have
  • Has
  • have

Part 2:

  • Has
  • Have
  • Has
  • Have
  • has

Part 3:

  • has
  • have
  • has
  • have
  • has

Part 4:
(Answers will vary based on students’ drawings and sentences.)

Part 5:

  • a
  • b
  • c
  • d

This should solidify the use of “has” and “have” funnily and entertainingly. Print and make copies as needed.

Practice Time!

Now that you know the basics, let’s try practicing! Here are some exercises for mastering “has” and “have”:

Fill in the Blanks

  1. I ______ a big pencil.
  2. My mom ______ a blue pen.
  3. The cat ______ a ball.
  4. We ______ a big house.
  5. The baby ______ a toy.

Answers

  1. have
  2. has
  3. has
  4. have
  5. has

More Fun Exercises

  • Create your own sentences using “has” and “have” with different subjects.
  • Draw a picture of something you have or something your friend has.
  • Write a short story using “has” and “have” correctly.

Conclusion

Congratulations, young scholars! You have just reached the last page of our adventure into “Has” and “Have.” Remember, it takes practice to get perfection; therefore, keep practicing so soon you can master these two great verbs.

Before cooking pork chops, something comes into play: subjects on how fresh and safe from consumption they are.

Pork chops are easily spoiled and may cause some sort of food poisoning if the meat is contaminated; hence, we shall begin by elaborating on early signs that pork chops are spoiled, checking their freshness, and then how to store, handle, and cook them safe for delicious pork chops.

Visual Signs of Spoilage

When inspecting pork chops, look for the following visual signs of spoilage:

  • Slime or mold on the surface: Its surface is covered with slimes or molds. It therefore means the meat has gone bad. Toss it immediately into the trash.
  • Discoloration or unusual color: Fresh pork chops can look pinkish-white. They should be bad if they start turning grayish, greenish, or even an odd color altogether.
  • Soft or mushy texture: Pork chops are always firm; therefore, it’s bad if a pork chop feels soft or mushy.
  • Slimy or sticky texture: The pork chops are bad, and this is portrayed through their texture of being watery or even sloppy.

Odor and Smell

If the pork chops smell like pork chops, then well, then it is fresh. These are observations:

  • Strong, unpleasant odor: Fresh pork chops should have a light sweet smell. If it smells pungent with spice, then chances are, it is already spoiled.
  • Sour or ammonia smell. When chops produce a sour or ammonia smell, then they are bad.
  • Odourless: Sometimes, the statement that pork chops are odorless can be an indication that pork chops are stale or very old.

Texture and Firmness

Check if the pork chops are even and tender by looking out for:

  • Soft or mushy texture: Fresh pork chops must have a firm feel. They probably go bad if they feel soft or mushy to the touch.
  • Slimy or sticky texture: If there are slits in the body and it looks slimy or sticky, the pork chops are spoiled.
  • No springiness or bounce when pressed: Fresh pork chops feel springy. They may be ready when it is out of this -beyond their best before date.

Storage and Handling

Some storage and handling tips can ensure your pork chops are pretty fresh and ready to use.

  • Fill a covered container or plastic bag tightly with pork chops and store in the refrigerator at 40°F (4°C) or below.
  • Freezing and thawing guidelines: If the chops are not opened within a day or two, it has to be placed in the freezer. It can then be thawed in a fridge or cold running tap water.
  • Cooking and preparation instructions. Always maintain personal hygiene, namely before and after handling as well as after leaving the pork chops. Cook pork chops to at least 145 F (63C) before consumption.

Cooking and Preparation

Only in this manner can pork chops be cooked without hazard.

  • Cooking methods and temperatures: Grill or pan-fry or bake pork chops. Finally, it has to be cooked so that at least an inner temperature of 145°F (63°C) is achieved.
  • Among them include safe handling as well as preparation of pork chops, proper hand washing before and after handling the pork chops, and cooking pork chops till the internal temperature has reached at least 145 F or 63 C.

Warning Signs That Your Pork Is Bad

Other common signs that your pork has aged are the following:

  • Off smell or taste: If pork chops prefer to leave an off smell or an odd taste, then for sure, they are rotten.
  • Slimy or Sticky: Mostly, if the pork chops are slimy or sticky, then it is ba
  • You can see moulds or slims around the surface: You are going to realize them to be spoiled when you would see visible molds or slims surrounding the surface of your pork chops.
  • Discoloration or odd-colored: If the color of the pork chops turns grayish green or does not change color, that would characterize spoilage.

These guidelines and tips ensure your pork chops’ freshness, safety, and deliciousness. Always remembering the safety of food while handling it avoids food-borne diseases.

Conclusion

For instance, if you know the appearance of those rotten pork chops, you will always serve fresh meat and not rotten meat.

According to the guidelines, you must check for visual signs of spoilage, odor or smell, and its storage and handling. Therefore, we should not forget the care given to food service and the safety of people from diseases.